Pinhole Camera
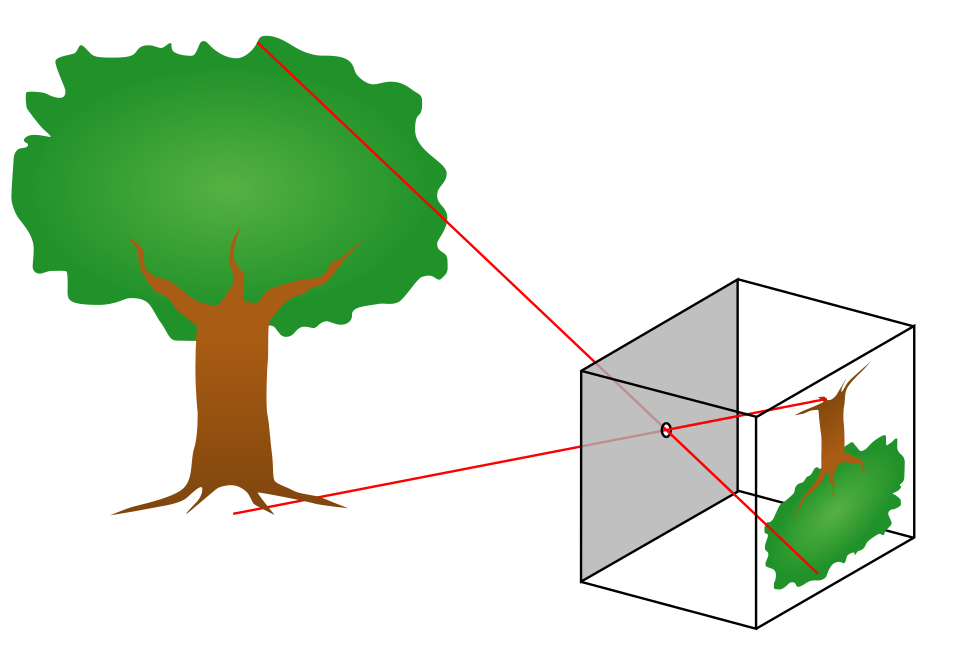

A pinhole camera is a camera without a conventional glass lens. An extremely small hole in a thin material can create an image when all light rays from a scene go through a single point. In order to produce a reasonably clear image, the aperture has to be about 1/100th the distance to the screen, or less. The shutter of a pinhole camera usually consists of a hand operated flap of some light-proof material to cover and uncover the pinhole.
A common use of a pinhole camera is to capture the movement of sunlight over a long period of time. This type of photography is called Solargraphy. Pinhole cameras require much longer exposure times than conventional cameras because of the small aperture; typical exposure times can range from 5 seconds to hours or days.
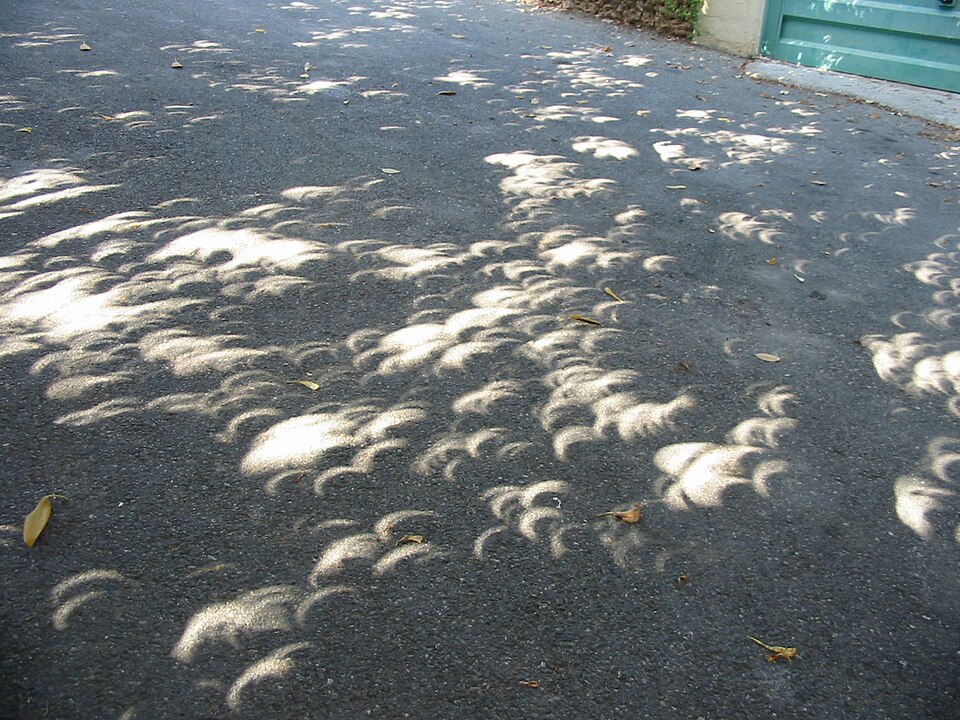
The image may be projected on a translucent screen for real-time viewing (popular for viewing solar eclipses; see also camera obscura).
Like other cameras, pinhole cameras make the picture upside-down.
Invention of pinhole camera
Very early in history (as far back as 500 B.C.), Greeks such as Aristotle and Euclid wrote on naturally-occurring rudimentary pinhole cameras, for example light may travel through the slits of wicker baskets and the crossing of leaves The ancient Greeks, however, believed that our eye emitted rays which enabled us to see. What enabled a much better understanding of the pinhole camera was the discovery that light enters the eye rather than leaving it. It was the 10th-century Muslim mathematician, astronomer and physicist Ibn al-Haytham who published this idea.
Written for younger readers
Pinhole Camera, in simpler words
This version comes from Wikijunior, a set of books written for children aged 8 to 11. It is shorter and uses plainer language than the article above.
From Wikijunior: Big Book of Fun Science Experiments
You will need these things:
- A Long Box (The longer the box the bigger the picture will be)
- A Pin or Needle
- Some Glue
- Some Tin Foil
- A Ruler
- A Pair of Scissors
Step 1: Cut a square hole in the top of the box on the smaller end that is about (use your ruler!) Step 2: Draw a line around the hole with some glue, then put a square on tinfoil on top so that the hole is covered. Step 3: Once the glue is dried, poke a tiny hole in the tin foil with the pin. Step 4: Cut a hole on the long side of the box so that you can see the bottom of the inside of the box.
Next time you know there is going to be a solar eclipse, point your pinhole camera towards the sun. The light will shine in through the pinhole and out onto the bottom of the box. Looking right at the sun can hurt your eyes, so using a Pinhole Camera is a fun and safe way to watch eclipses.
Where this page comes from
The article above is adapted from “Pinhole Camera” on Simple English Wikipedia, by its contributors. We removed reference markers, navigation boxes and tables, expanded measurement templates into readable numbers, and kept the prose otherwise intact. The simpler version is adapted from Wikijunior on Wikibooks.
Both sources are published under CC BY-SA 4.0, so this page is published under the same licence. You may share and adapt it, including commercially, as long as you credit the original and keep the same licence.
Worksheets, answer keys and printable layouts elsewhere on K5Print are our own work and are not covered by this licence.